Motivation
Could one teach a self-driving car (SDC) to drive itself by mimicking a human driver? This question may be laughable at its surface, but is surprisingly deep, both technically as well as in its implementation, as we shall see.
Known in industry parlance as behavior cloning, the nature of this problem is very simple. Teach an autonomous vehicle to mimic a human driver by letting it learn when to accelerate, slow down, brake, and how to steer correctly to stay on the road. Naturally, this raises several questions, such as when to appropriately steer (turn), when (and how much) to accelerate, when to brake.
The surprising part is that behavior cloning works, under certain conditions, thanks to deep learning, and loads and loads of training data.
Introduction
As part of Udacity’s Nanodegree program, the aim of the project is to teach a simulated car to drive itself along a closed-loop training track.
The traning consists of getting the (simulated) car to recognize road images, and learn to steer left/right/center to keep driving on the road. The main input is a series of left/right/center images of the road, along with (human-trained) steering angles. In the training phase, you drive the simulator manually, generating enough training images and steering angles. You then use the training data to feed into a convolutional neural network (CNN), which produces a model for the car to drive autonomously. With enough training data, the car will learn to keep itself on road by outputting correct steering angles. Sounds fairly simple, but the execution is complicated.
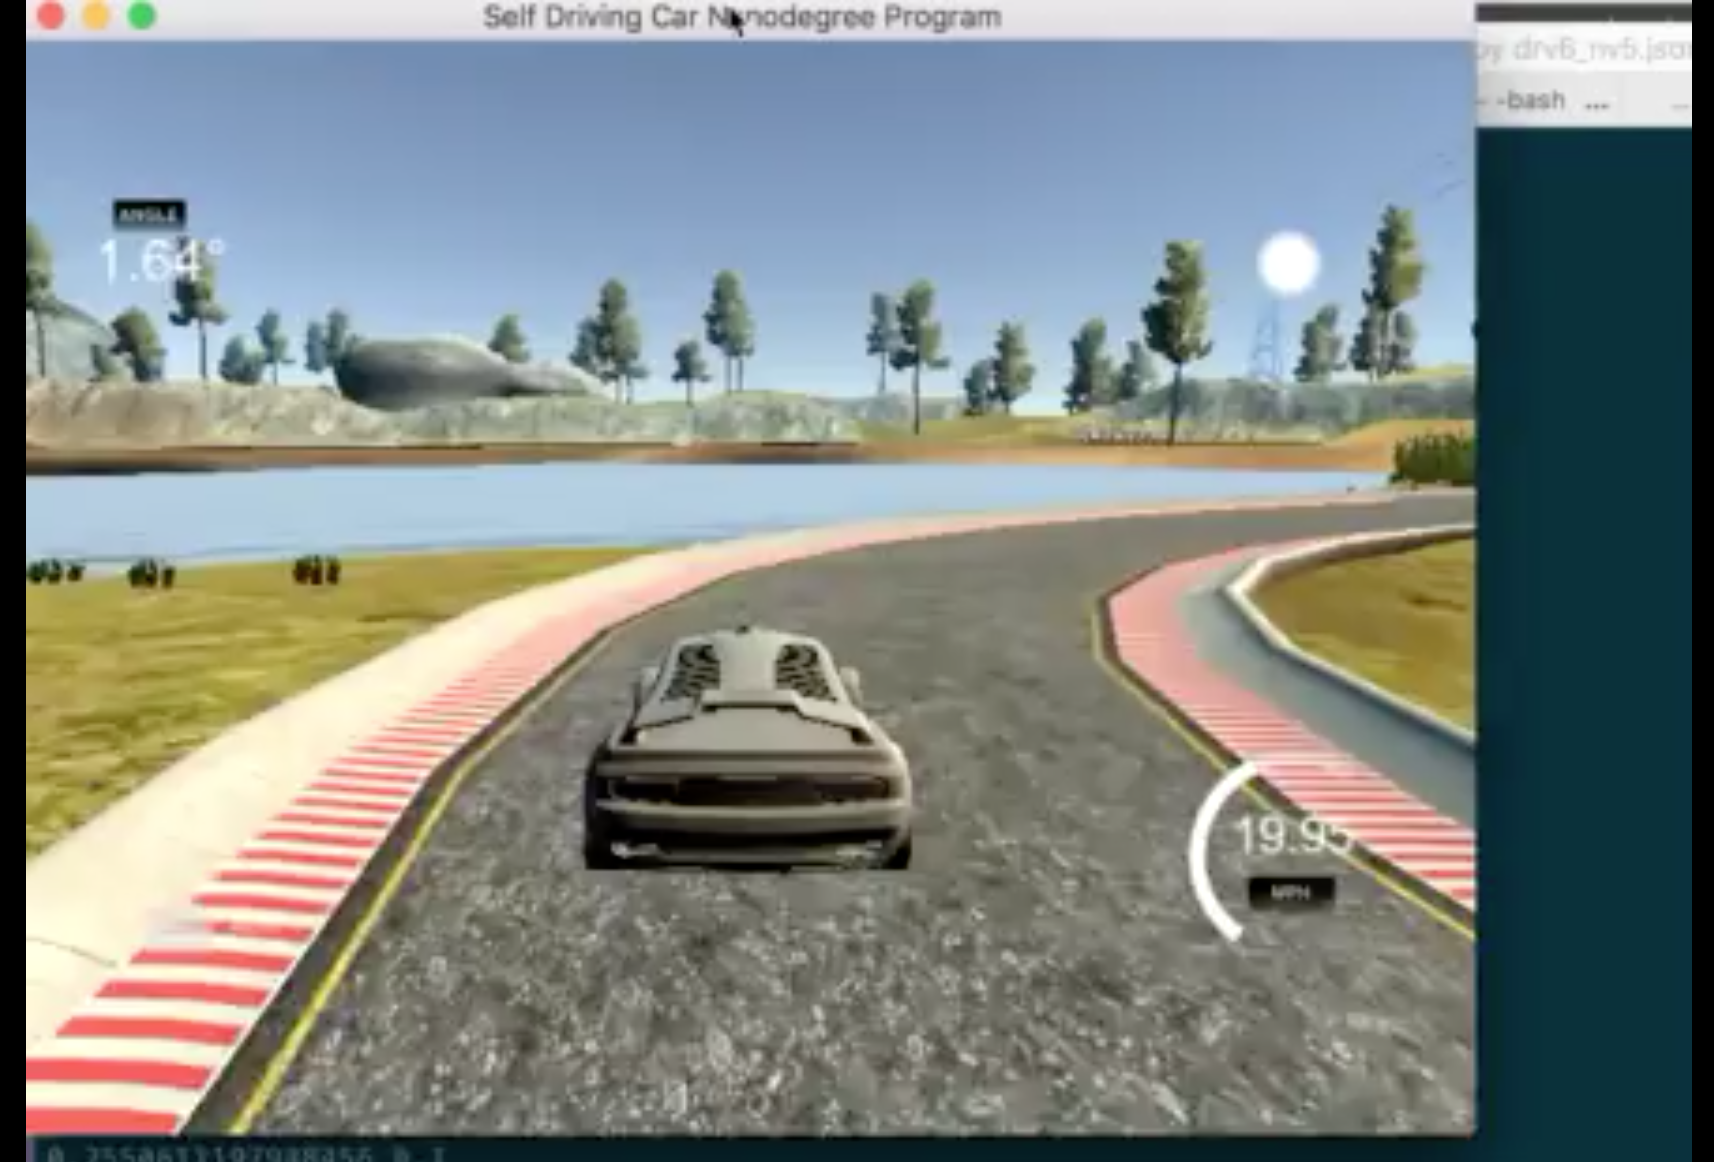
TLDR
The simulated car drives autonomously on Track 1. See video here:
Approach
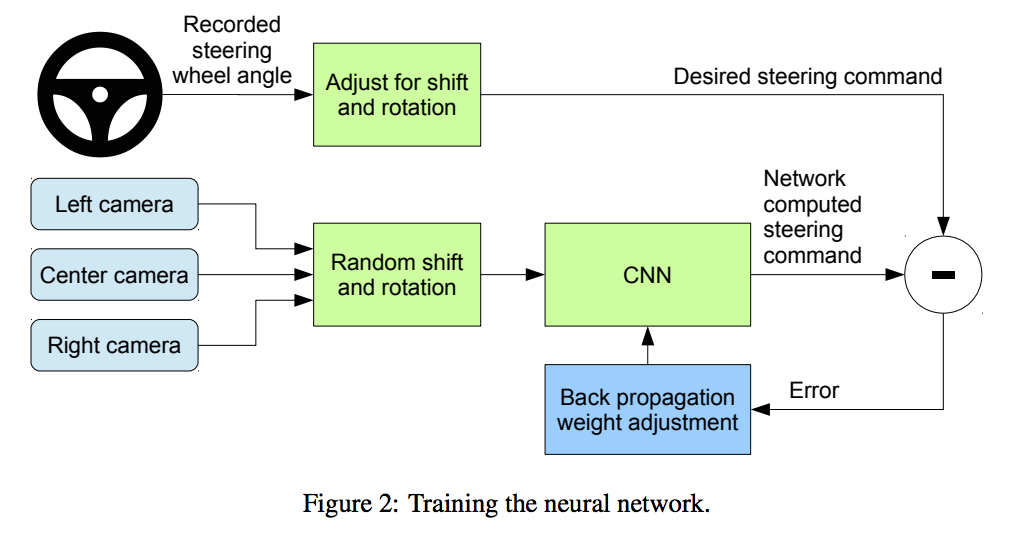
What deep learning architecture is best to train such an autonomous vehicle? There are several approaches, but Udacity recommends starting with NVIDIA’s End-to-End training model[1] and refining it.
NVIDIA’s End-to-End training architecture
Training Data
As with most machine learning projects, a neural network needs data (and lots of it) to train. The biggest challenge in this project was to generate enough simulated driving data. This was a big challenge for me, as I suck at most video games. However, after crashing the car a few times, I was able to (manually) drive it across the track several times. This generated camera images from the left/right/center cameras, along with the required steering angles.
Two things helped:
Udacity data
Udacity included a dataset of ~8K samples of Center/Left/Right camera images.
My own data
I generated several datasets of varying length (5-10 min simulated driving) ranging from 10K - 25K samples. In the end, added up both mine and Udacity datasets for my final training, which resulted in about 35-40K samples. For me this was one of the most time consuming steps as I wasn’t sure how much data to generate. Thankfully, reading a few articles about others’ experiences of their own training made me comfortable about 30K-40K training samples.
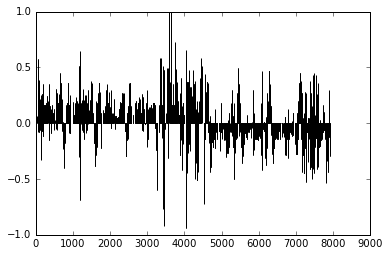
Exploratory analysis: Steering Angles
Plotting the Udacity training data, you can see that because of the (left-curved) track, most of the steering is on the left.
The second chart shows a better picture of steering: much of the driving is straight (0 degree), but there are pleny of Lefts (-ve angles) and some Rights (+ve angles). There are also some very sharp turns (angles > 8-10 degrees) indicating a curving track.
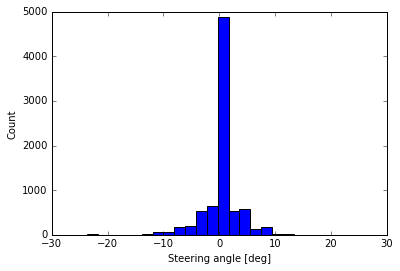
Clearly, we would have to train the car for both steering straight and left/right appropriately.
Data Augmentation
As suggested, we would have to augment the training data to let the car detect adverse conditions (light/dark images, clipped borders, etc.) As recommended by a few people (see in Acknowledgements), I augmented the data in three key ways:
- Brightness augmentation: changed brightness of images by a small amount (darker/lighter)
- Image translation: translated images (shifted in x/y dimension)
- Image flipping: randomly flipped some images horizontally
This augmentation helps the network detect images on unknown tracks and generalize better.
Steering Smoothing
By far, the biggest problem was getting the car to steer right/left appropriately based on the track. Sometimes the car would jerk sharply to the right or left. Reading recommendations from Vivek Yadav and Mohan Karthik helped; they recommended adding a small smoothing angle (+/- 0.25 - 0.3) to Right/Left images to simulate center driving. I tested out with steering bias of 0.25, but finally settled with 0.3. This worked well.
Image Preprocessing
Each image was pre-processed so that only the most effective part of the image was retained and the distracting elements were removed.
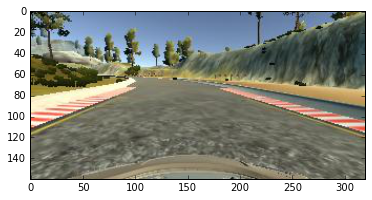
Having already decided to use the NVIDIA end-to-end driving network architecture (which uses an image of 66x200x3 dimensions), after some trial and error I decided on cropping top part of the original image to produce a reduced size image.
The original image was size 160 (H) x 320 (W) pixels (x 3 Channels [=RGB]).
The cropped image: 100 (H) x 250 (W):
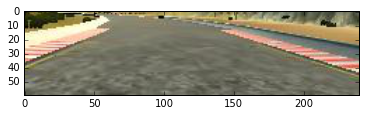
The cropped image was resized further to 66x200x3 to fit the NVIDIA end-to-end model.
Model Architecture
I used the (simpler/smaller) NVIDIA end-to-end driving architecture. I modified it a little bit to include a new 1024-dense fully connected layer. Various architectures were tested manually with trial-and-error, some with less satisfactory results than other (= car drove off-track).
The final architecture is as follows:

- Total params: 1,841,961
- Trainable params: 1,841,961
- Non-trainable params: 0
Additionally, I tried the VGG model and a smaller VGG model; however, as these models had more params, the training times were excrutiatingly long. As a result, I ended up using mostly the NVIDIA model.
I used a Lambda layer as the first layer to normalize the images:
   # normalize between -0.5to 0.5
    model.add(Lambda(lambda x: x/255. - 0.5, input_shape=(IMG_HEIGHT, IMG_WIDTH, NUM_CHANNELS) , output_shape=shape))
The listing below shows the model created:
def create_nvidia_model(shape=(IMG_HEIGHT, IMG_WIDTH, NUM_CHANNELS)):
    ''' Create and return a Keras model (based on Nvidia's end-to-end driving)
        :param shape - input shape (currently 66(H)x200(W)x3(Channels)
        :return the Keras model
    '''

    print('Creating Model Nvidia for shape:', shape)
    model = Sequential()
    # normalize between -0.5to 0.5
    model.add(Lambda(lambda x: x/255. - 0.5, input_shape=shape, output_shape=shape))

    # Conv layers
    model.add(Convolution2D(24, 5, 5, border_mode='valid', subsample=(2, 2),
                            activation='elu', name='conv0'))
    #model.add(Dropout(0.2))
    model.add(Convolution2D(36, 5, 5, border_mode='valid', subsample=(2, 2),
                           activation='elu', name='conv1'))
    model.add(Dropout(0.2))
    model.add(Convolution2D(48, 5, 5, border_mode='valid', subsample=(2, 2),
                           activation='elu', name='conv2'))
    #model.add(Dropout(0.2))
    model.add(Convolution2D(64, 3, 3, border_mode='valid', subsample=(1, 1),
                           activation='elu', name='conv3'))
    model.add(Dropout(0.2))
    model.add(Convolution2D(64, 3, 3, border_mode='valid', subsample=(1, 1),
                           activation='elu', name='conv4'))
    #model.add(Dropout(0.2))

    model.add(Flatten())
    #model.add(Dropout(0.5))

    # FC layers
    model.add(Dense(1024, activation='elu',name='fc0'))
    model.add(Dropout(0.5))
    model.add(Dense(512, activation='elu',name='fc1'))
    model.add(Dropout(0.5))
    #model.add(Dense(50, activation='elu',name='fc2'))
    model.add(Dense(10, activation='elu',name='fc3'))
    model.add(Dropout(0.3))
    model.add(Dense(1, name='fc4'))

    return model
Regularization
Regularization was done by: - Dropout ranging from 0.2 to 0.5 between CNN and FC Layers - Learning Rate reduction (using Keras callbacks)
lr_schedule = ReduceLROnPlateau(monitor='val_loss', factor=0.2, patience=2, verbose=1)
Training
- Adam Optimizer Used the default Adam optimizer with initial
learning_rate=0.0001 - Generator Used a batch generator to continuously generate image batches of size 128. Tested out batch sizes of 64 and 256 as well, but stuck with 128 as this was the most optimal. During training, my MacbookPro kept running out of GPU memory and thus failed intermittently. This is likely a bug in TensorFlow. Thus I ended up training mostly on CPU.
I trained the models for 5 epochs, and then evaluated the results on the track. Some models failed hilariously; the car went right into the lake. Others failed on the bridge. I took the promising models and further refined some hyperparams and increased the training time to 10-12 epochs. This resulted in the final.
As a side note, the validation loss did not matter a lot. The final validation loss was in the 0.03-0.05 range.
Driving Results
On Track1 the model runs well. The simulated driving closely mimics the training samples; this is indicated most closely when the car takes sharp left turns after crossing the bridge. Additionally, it swerves a little on the bridge as I had manually added some swerving and recovery samples, especially while crossing the bridge.
Recovery The car recovers well when it is swerving; this is because of recovery data (moving from close to right/left barries to the center of the lane).
Reflections
This was one of the most interesting yet exasperating projects. It took much longer than anticipated due to a few key reasons:
- Generating the training data took time
- Testing out candidate model architectures took a long time. In the end, the NVIDIA model turned out quite good. As I was doing most of the training without a GPU on my Macbook Pro, it added to the training woes.
- Tuning the hyper params took a lot of trial/error
- Smoothening of steering took some effort.
Code
The code for the project is on my Github repo
Acknowledgements and References
I gratefully acknowledge ideas from various sources, including the following: